So in recent news I am obsessed with Deco. That's right. I love deco. So in light of this most recent "lolita-esque" obsession, this entire post will be related it it.
http://fullmoon07xxx.ocnk.net/
This is the site that I have bought all of my deco supplies. Items are cheep but wonderful quality and you can easily figure shipping and have your order in a most timely manor.
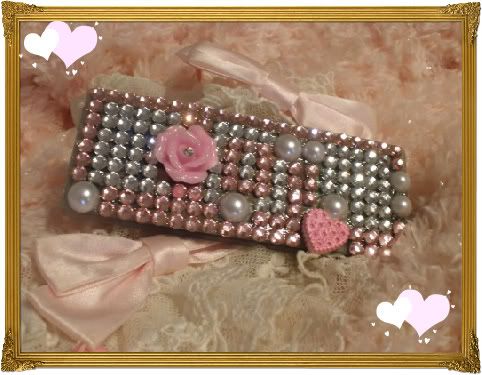
This is a Nintendo DS game case. This is to hold three DS game cartridges. All the parts come from the site I named above. ^^ The glue I use is "GOOP". It's most easily applied by squeezing an amount on a pop sickle stick or any other flat wooden stick and spreading it over the portion you wish to deco first. Don't do too much at a time as it might start to dry before you get to it. I find that when my fan is on, it dries even quicker. @_@
~*~*~*~*~*~
Here are a few tips that could really help someone who is just starting off.
(I'll be working on a photo tutorial later!)
1. DECIDE WHAT YOU WANT TO DECORATE.
Some good idea's are DS cases, Phone cases, or even a trinket box. I DO NOT suggest trying to deco your camera or phone directly without having tried it on something else and having gotten the hang of it. I found a small wooden box at a garage sale and I painted and deco'd it before I tried on anything else.
2. BUY YOUR DECO PIECES.
I don't suggest buying them in Decoden packs as they kind of limit what you can do. Try and look around Fullmoon and see if you see a piece that strikes your fancy and build off of that. I was inspired by the clay roses when I deco'd my flip!
3. GET YOUR SUPPLIES.
You will need:
1. Glue
2. Flat wooden stick
3. Protective surface
4. Tweezers or something to lift the rhinestones
5. Your deco parts
6. Your deco piece
7. Paint - (Not all the time)
4. FIGURE OUT YOUR DESIGN.
It will become a hassle if you lay down your glue and start putting things on, only to find out that this doesn't go with that and these would have looked so much better over there. Keep in mind that rhinestones are round and therefore you WILL see the surface of what you are decorating. If your case is green they using pink acrylic paint (Nothing special, just generic) can save you from one insanely bad looking piece.
5. START!
HINT: IT'S BEST TO PLACE LARGER PIECES FIRST IN MOST SITUATIONS!
How you decide to deco is completely up to you. I personally prefer lot's of rhinestones and in that case I like them to be even and in straight lines. I also prefer to have a two tone color scheme but please don't let that stop you. Be creative. This is about expressing your personality. I am a fan of cute simplicity. ^.O
6. LET. IT. DRY.
Don't make a case in the morning and expect to take it to a meet that night. Let your finished piece sit over night to be sure it's completely dry. If it' not then it becomes inevitable that you will loose pieces and you might even chance getting something really sticky in your new bunny bear.
This is a finished product!
This is my flip. When I received it, it had this horrid blue team logo on it from work. It was an eyesore. I painted it over in white and added onto it. Knowing what I know now, I might have bought a case to deco instead as the paint is now peeling off since I did it on plastic. HOWEVER, it also might have something to do with the fact that I tossed it directly into my purse many times and it was no doubt just rolling around in there.
So I'm trying something new and I'll be back next time with a NON-DECOTTI whipped cream tutorial.
I really do hope that this helped in some manner!
Have a lovely day everyone!
Love you all!
-Japhia
http://fullmoon07xxx.ocnk.net/
This is the site that I have bought all of my deco supplies. Items are cheep but wonderful quality and you can easily figure shipping and have your order in a most timely manor.
This is a Nintendo DS game case. This is to hold three DS game cartridges. All the parts come from the site I named above. ^^ The glue I use is "GOOP". It's most easily applied by squeezing an amount on a pop sickle stick or any other flat wooden stick and spreading it over the portion you wish to deco first. Don't do too much at a time as it might start to dry before you get to it. I find that when my fan is on, it dries even quicker. @_@
~*~*~*~*~*~
Here are a few tips that could really help someone who is just starting off.
(I'll be working on a photo tutorial later!)
1. DECIDE WHAT YOU WANT TO DECORATE.
Some good idea's are DS cases, Phone cases, or even a trinket box. I DO NOT suggest trying to deco your camera or phone directly without having tried it on something else and having gotten the hang of it. I found a small wooden box at a garage sale and I painted and deco'd it before I tried on anything else.
2. BUY YOUR DECO PIECES.
I don't suggest buying them in Decoden packs as they kind of limit what you can do. Try and look around Fullmoon and see if you see a piece that strikes your fancy and build off of that. I was inspired by the clay roses when I deco'd my flip!
3. GET YOUR SUPPLIES.
You will need:
1. Glue
2. Flat wooden stick
3. Protective surface
4. Tweezers or something to lift the rhinestones
5. Your deco parts
6. Your deco piece
7. Paint - (Not all the time)
4. FIGURE OUT YOUR DESIGN.
It will become a hassle if you lay down your glue and start putting things on, only to find out that this doesn't go with that and these would have looked so much better over there. Keep in mind that rhinestones are round and therefore you WILL see the surface of what you are decorating. If your case is green they using pink acrylic paint (Nothing special, just generic) can save you from one insanely bad looking piece.
5. START!
HINT: IT'S BEST TO PLACE LARGER PIECES FIRST IN MOST SITUATIONS!
How you decide to deco is completely up to you. I personally prefer lot's of rhinestones and in that case I like them to be even and in straight lines. I also prefer to have a two tone color scheme but please don't let that stop you. Be creative. This is about expressing your personality. I am a fan of cute simplicity. ^.O
6. LET. IT. DRY.
Don't make a case in the morning and expect to take it to a meet that night. Let your finished piece sit over night to be sure it's completely dry. If it' not then it becomes inevitable that you will loose pieces and you might even chance getting something really sticky in your new bunny bear.
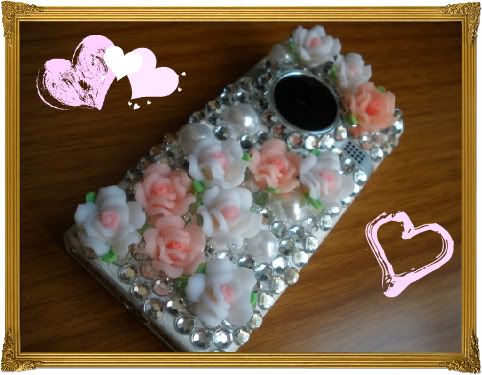
This is a finished product!
This is my flip. When I received it, it had this horrid blue team logo on it from work. It was an eyesore. I painted it over in white and added onto it. Knowing what I know now, I might have bought a case to deco instead as the paint is now peeling off since I did it on plastic. HOWEVER, it also might have something to do with the fact that I tossed it directly into my purse many times and it was no doubt just rolling around in there.
So I'm trying something new and I'll be back next time with a NON-DECOTTI whipped cream tutorial.
I really do hope that this helped in some manner!
Have a lovely day everyone!
Love you all!
-Japhia

No comments:
Post a Comment